How to Clean Fiber Optic Connectors: Field Cleaning Guide
The number one cause of fiber optic link failures in production isn’t bad cable, broken connectors, or wrong SFP modules. It’s dirt. A single dust particle 1 micrometer wide sitting on a 9 micrometer single mode core can block or scatter enough light to kill a link. On multimode, the tolerances are more forgiving, but contamination still causes insertion loss spikes, intermittent dropouts, and the kind of mystery failures that eat your troubleshooting time at 2 AM during a live show.
Cleaning fiber connectors takes 10 seconds and prevents most of the problems you’ll deal with on a fiber run. This guide covers the tools, techniques, and inspection standards you need.
Why Clean Fiber Connectors?
Every time a connector is unmated, the end face picks up contamination. In production environments (arenas, stadiums, broadcast compounds, festival sites), the contamination is aggressive: dust, dirt, moisture, smoke machine residue, fingerprint oils, and debris from road cases.
Here’s what each contamination type does to your signal:
- Dust and particulates scatter light at the core, increasing insertion loss. A 1 micrometer particle on a single mode core can add 1 dB of loss.
- Oil and fingerprints leave a film across the end face that absorbs and scatters light. One careless touch of a ferrule tip can degrade a connector from 0.2 dB insertion loss to over 1.0 dB.
- Moisture attracts more particulates and can etch glass over time, causing permanent damage.
- Debris and crushed particles can scratch or pit the polished end face, requiring re-termination.
The math doesn’t care. A typical single mode link budget allows 3-5 dB of total loss across multiple connections and cable spans. Two or three dirty connectors eat the entire budget, and the link drops.
Cleaning Tools and Methods
Three cleaning methods work in the field, and each has a specific use case.
One-Click Cleaners
One-click cleaners do most of the work in field fiber cleaning. A spring-loaded mechanism presses clean, dry, non-abrasive tape against the connector ferrule end face with controlled pressure. You insert the connector (or the cleaner tip into an adapter), press the button, and the cleaning surface advances automatically.
The major brands:
- NTT-AT CLETOP — the industry standard. Available for LC, SC, ST, FC, and MTP/MPO connectors. 500+ cleanings per cartridge.
- Sticklers (MicroCare) — CleanClicker line. Similar mechanism, competitive pricing. Good LC and MPO options.
- US Conec IBC — particularly strong for MTP/MPO cleaning where the flat, multi-fiber end face requires a wider cleaning surface.
Correct usage: Insert the connector ferrule into the cleaner port. Press the button once — you’ll feel a click. Remove. That’s it. Don’t press multiple times; each click advances the tape to a fresh section. If you multi-click, you waste cleaning surfaces without improving results.
When to replace: Most cartridges are rated for 500 cleanings. Replace when the indicator shows the tape is exhausted, or when the mechanism stops clicking firmly. A worn cartridge can redeposit contamination.
Lint-Free Wipes + IPA
For heavy contamination (fingerprint oils, adhesive residue, smoke machine deposits), a one-click cleaner alone won’t cut it. The wet-dry IPA technique handles what dry cleaning can’t.
Materials: 99% or higher isopropyl alcohol (IPA) and lint-free optical-grade wipes. Standard lens wipes often leave fibers behind; use wipes specifically rated for fiber optic cleaning.
Technique:
- Apply a small amount of 99% IPA to one section of the wipe.
- Draw the connector ferrule across the wet section in one direction — don’t scrub back and forth.
- Immediately draw the ferrule across a dry section of the wipe in the same direction.
- The wet pass dissolves the contamination; the dry pass removes it and evaporates residual alcohol.
Never let IPA air-dry on the end face. The dry wipe step is not optional. Evaporating alcohol leaves dissolved contaminants behind as residue.
Compressed Air
Compressed air removes loose particles before wet or dry cleaning. Use it as a first step, not a complete cleaning method.
Requirements: The air must be filtered, dry, and oil-free. A regulated compressed air source with a particulate filter and moisture trap works best.
Never use canned air (aerosol dusters) on fiber end faces. Canned air contains propellant chemicals that deposit residue on the glass surface. That residue is worse than the dust you’re trying to remove. If canned air is all you have, skip this step entirely and go straight to a one-click cleaner.
| Method | Best For | Removes Oil | Cost Per Clean | Field Portable |
|---|---|---|---|---|
| One-click cleaner | Routine cleaning, dust, light contamination | Partially | ~$0.05 | Yes |
| IPA wet-dry wipe | Heavy contamination, oils, fingerprints | Yes | ~$0.15 | Yes |
| Compressed air | Loose particles (pre-cleaning step) | No | Negligible | Depends on source |
| One-click + IPA combo | Worst-case contamination | Yes | ~$0.20 | Yes |
Inspection Before and After Cleaning
Cleaning without inspection is guesswork. You don’t know if the connector was dirty, you don’t know if your cleaning worked, and you can’t tell a dirty connector from a damaged one. A fiber inspection scope at 200-400x magnification turns connector cleaning from a ritual into a measurable process.
What You’re Looking At
The IEC 61300-3-35 standard defines four concentric zones on a connector end face, each with specific pass/fail criteria:
- Zone A (Core) is the fiber core itself. On single mode, this is roughly the central 25 micrometer diameter area. Zero defects or contamination allowed. Any particle here hits your signal directly.
- Zone B (Cladding) is the 120 micrometer diameter cladding area surrounding the core. No scratches over 3 micrometers. Limited number of defects allowed.
- Zone C (Adhesive/Epoxy) is the area between cladding and ferrule. Some contamination is tolerable, but heavy buildup here migrates to the core zone over time.
- Zone D (Contact) is the ferrule contact area that physically touches the mating connector. Contamination here transfers to the core zone of the mating connector and can scratch end faces during mating.
Pass or Fail?
With a Fluke Networks FI-7000 or similar inspection scope, the software can automatically grade end faces against IEC 61300-3-35. But even with a basic manual scope, the rule is simple: if you see anything in the core zone, the connector fails. Clean and re-inspect.
When to Clean vs. When to Re-Terminate
Contamination cleans off. Damage doesn’t. If you see scratches, chips, or pits in the core or cladding zone that survive multiple cleaning cycles, the connector needs re-termination or replacement. Mating a damaged connector will damage the connector on the other side too.
For more on testing fiber links after cleaning, see our guide on how to test fiber cable.
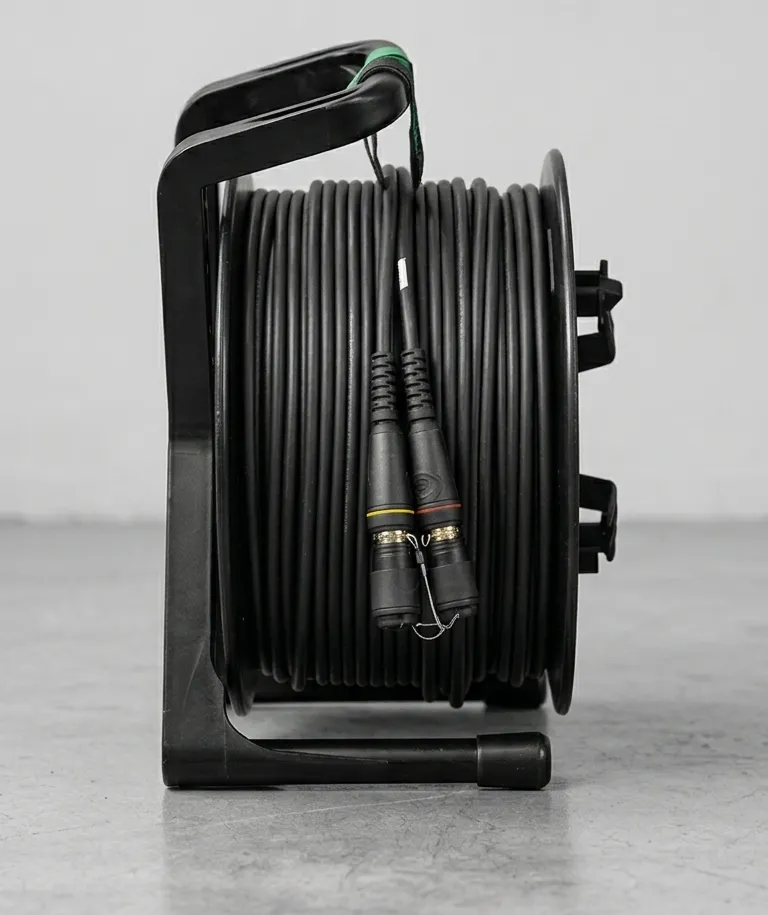
Cleaning Neutrik opticalCON Connectors
Neutrik opticalCON connectors (DUO and QUAD) add a rugged housing around standard LC ferrules. The housing includes automatic spring-loaded dust caps that protect the ferrules when unmated. That protection is real, but it changes the cleaning workflow.
Accessing the LC Ferrule
The opticalCON dust caps keep out environmental contamination, but they don’t clean the ferrules. Before mating, you still need to get at the actual LC ferrule end faces inside the housing.
DUO connectors house two LC ferrules. Retract or remove the dust cap assembly to expose the ferrules, then clean each LC ferrule individually with an LC-sized one-click cleaner. The CLETOP-S (Type A) fits standard LC ferrules inside opticalCON housings.
QUAD connectors house four LC ferrules. Same process, four times. Work systematically — clean all four, inspect all four.
Dust Cap Discipline
The automatic dust caps on opticalCON connectors are one of the best features of the format, but only if you let them work. Always let the dust cap close when the connector is unmated. Don’t tape caps open, don’t remove them, and don’t let dirt build up on the cap surfaces themselves. A dirty dust cap deposits contamination directly onto clean ferrules.
When storing opticalCON cables, verify the dust caps are seated and the connector shells are clean. A quick wipe of the exterior housing before deployment keeps debris from falling into the connector during mating.
For more on cable handling and storage, see our fiber bend radius guide.
Field Cleaning Procedure (Step-by-Step)
This is the procedure. Every connector, every time, no exceptions.
-
Remove dust caps — carefully, without touching the ferrule end face. Set caps aside face-down on a clean surface, or keep them in a small bag.
-
Inspect with scope — look at the end face at 200-400x. Note contamination type and location. If it’s already clean (rare in the field), skip to step 5.
-
Clean — choose your method based on what you see:
- Dust and light particles: one-click cleaner.
- Oil, fingerprints, or heavy contamination: IPA wet-dry wipe, followed by one-click cleaner.
- Loose debris visible: compressed air first, then one-click cleaner.
-
Re-inspect — look at the end face again. The core zone must be completely clear. Cladding zone should be free of large defects.
-
If pass — mate the connectors promptly. Don’t clean a connector and then leave it sitting uncapped while you finish something else.
-
If fail — repeat the cleaning cycle (step 3-4). If the connector fails after three cleaning cycles, suspect physical damage. Inspect under higher magnification. If damage is confirmed, flag the cable for re-termination and use a spare.
Connector Care Best Practices
Cleaning technique matters, but prevention saves you more time. These practices reduce how often you’re cleaning in the first place:
- Always cap unmated connectors. Every connector, every time. Dust caps exist for a reason. Keep a bag of spares in your cleaning kit.
- Store cable with dust caps installed. Before coiling and casing cable, verify every connector is capped. This is a wrap discipline issue — make it part of your crew’s cable wrap procedure.
- Never touch fiber end faces. Sounds obvious, but it happens constantly. Grabbing a connector by the ferrule tip deposits skin oils that require IPA cleaning to remove.
- Clean before every connection in the field. Not just when you suspect a problem. Proactive cleaning takes 10 seconds per connector. Troubleshooting a dirty connector during a show takes minutes you don’t have.
- Include a cleaning kit in every cable case. One-click cleaner, lint-free wipes, 99% IPA pen, inspection scope. If the kit isn’t with the cable, it won’t get used.
- Replace cleaning supplies before they’re exhausted. A one-click cleaner with 20 cleanings left will run out mid-deployment. Track usage and rotate stock.
Frequently Asked Questions
How often should I clean fiber connectors?
Can I use regular alcohol to clean fiber?
What is a one-click fiber cleaner?
How do I know if a fiber connector is clean enough?
Summary
Fiber connector cleaning is not optional. The procedure is simple: inspect, clean, re-inspect, mate. The tools cost almost nothing compared to a failed link during a live show. The difference between crews that have “fiber problems” and crews that don’t is whether they actually do this every time.
Stock the tools, build the habit, and never mate a connector you haven’t inspected.